Thursday, August 21, 2014

Butter Caramels


While chocolate ruins supreme in our household caramel comes in a close second and at times edges out the competition. We love caramel in all forms, especially as a chewy butter caramel.  Sometimes you just need a little candy. It has always amazed me how you can start with a few basic ingredients and end up with something totally different. Such is the case with caramel, cooking sugar until it caramelizes then adding some butter and cream transforms it into a delectable treat that is sure to please any candy lover. As an added bonus these caramels are surprisingly easy to make.


If you don't count the water, just four ingredients - sugar, butter, cream, and salt - are all that is needed to make delicious homemade butter caramels.


Use a deep heavy-bottom saucepan. Put the sugar in the center of the pan. Pour the water around the sugar. Run a spoon through the middle of the sugar to moisten it, but do not stir the mixture.


Cook the caramel over medium-high heat until the sugar begins to caramelize and turns amber-colored. Don't be concerned if there is some crystallization around the edges. Most of it will melt when the cream and butter are added.


Use a long-handled wooden spoon when adding the butter and cream as the mixture will foam up and bubble vigorously.


Continue stirring until the butter, cream, and salt are incorporated and the mixture is completely smooth. Pour into a prepared loaf pan.


Allow the caramel to cool completely. Then transfer to a cutting board to cut into rectangles or squares. Wrap in waxed paper.


Store the caramels at room temperature. I noticed the contents of our caramel bowl dwindled rather rapidly as each time I entered the kitchen there were less than before. I'm not pointing any fingers, but chewy butter caramel candy has a way of disappearing pretty quickly in our house.


Butter Caramels
Adapted from Gayle Gand's Just a Bite

2 1/2 cups (500 g) granulated sugar
1/2 cup (125 ml) water
3 tablespoons (1 1/2 ounce/45 g) unsalted butter, cut into pieces
1/2 cup (125 ml) heavy cream, warmed
1/4 teaspoon salt

Line a loaf pan with parchment paper. Lightly spray with non-stick cooking oil. Pour the sugar in the center of a deep, heavy-bottom saucepan. Pour the water around the sugar. Carefully run a spoon through the middle of the sugar to moisten, but don't stir the sugar and water together. Cook over medium-high heat until the sugar syrup turns amber-colored. Swirl the mixture occasionally to even out the color. Don't be concerned if there is some crystallization around the sides of the pan most of it will melt when the cream and butter are added.

When the caramel is the right color remove from the heat. Using a long-handled wooden spoon carefully stir in the butter followed by the cream and salt. Be careful as the mixture will foam up and bubble vigorously. Continue to stir until the mixture is completely smooth. Pour the caramel into the prepared pan.

Allow to cool completely, about an hour. Once firm remove from the pan onto a cutting board, gently remove the parchment paper. Using a sharp knife cut into rectangles or squares. Wrap in waxed paper twisting the ends to close. Store at room temperature.


Tuesday, August 12, 2014

Doom Cookies


Addison has had a challenging summer. He has been doing an Architecture Internship while taking classes to prepare for his Master's year in the fall. He has enjoyed the Internship but juggling work and school has been a bit overwhelming. At times his normal happy-go-lucky demeanor has been replaced with a more gloom and doom attitude. Abnormal Psych and Ethics will do that to you. Maddie and I joke that he needs to lighten-up, which is something he would normally say to us. So, I decided a batch of 'doom cookies' might be in order to give him a chuckle and lift his spirits. 

Deep, dark chocolate seemed the right kind of cookie dough to fit his intense mood with something nutty or crunchy added in since Addison is feeling a little crazy. Caramelized Coconut adds the perfect crisp, toffee accent to balance out the rich chocolate flavor. If you are not a coconut fan use blanched almonds (whole, slivered, or sliced) in place of the coconut in the Caramelized Coconut recipe.

The biggest challenge in making these cookies is not eating all the Caramelized Coconut while putting together the chocolate cookie batter. It is highly additive and very delicious on its own. Although it only takes a few minutes to make the Caramelized Coconut if you don't want to bother you can substitute chopped chocolate covered toffee candy bars (like a Heath bar) or skip the candy and use nuts, plain coconut, or chocolate chips or any combination you desire. Just about anything can be stirred into the cookie dough. 


Caramelized Coconut

1 cup (70 g) dried, unsweetened, large-flake coconut
1/2 cup (100 g) granulated sugar
2 tablespoons (1 ounce/30 g) unsalted butter
sea salt

Lightly oil a baking sheet or line a baking sheet with a silicone baking mat.

Put the butter and sugar in a skillet (preferably non-stick) and sprinkle the coconut over the top. Cook over medium-low heat to melt the sugar and butter. Using a wooden spoon very gently move the coconut around in the pan. The melted sugar/butter mixture will coat the coconut as the coconut turns golden brown. Watch closely not to burn the coconut or the caramelized sugar. Don't stir the mixture vigorously or the sugar will crystallize. Once the coconut/caramel mixture is brown pour on prepared pan and gently spread mixture out a little. Sprinkle with a couple of pinches of sea salt. Allow to cool completely then break into pieces.


Doom Cookies
makes about 4 dozen cookies

1 pound (450 g) bittersweet or semi-sweet chocolate, chopped into small pieces
4 tablespoons (2 ounces/60 g) unsalted butter, cut into small pieces
1/2 cup (70 g) all-purpose flour
1/2 teaspoon baking powder
1/4 teaspoon salt
4 eggs, at room temperature
1 1/4 cups (250 g) granulated sugar
1 teaspoon vanilla extract
Caramelized Coconut broken into small pieces (or substitute nuts, coconut, and/or chocolate chips)

Melt chocolate and butter in a heat-proof bowl set over gently simmering water. Stir until smooth. Remove bowl from heat and set aside.

Whisk together flour, baking powder, and salt in a small bowl.

Put the eggs, sugar, and vanilla in the bowl of a standing mixer with a whisk attachment. Beat on high speed until light and the mixture forms a ribbon when the beater is lifted, about 5 minutes. On low speed add the chocolate mixture until thoroughly mixed. Fold in the flour then the caramelized coconut.

Cover and refrigerate the dough until firm 1-2 hours. If it is too solid to scoop allow it to sit for a few minutes to soften a little.


Preheat the oven to 350℉ (175℃). Using a small ice cream scoop or a large spoon form cookie dough into balls and flatten slightly on baking sheets lined with parchment paper or silicone baking mats.

Bake the cookies 10-12 minutes until the tops puff and crack. The edges will be set, but the middle will still be soft (like the inside of a brownie). Cool on the baking sheet for 5 minutes until set then transfer to a rack to cool completely. Store in an airtight container for up to 3 days.

Note: You can bake two baking sheets of cookies at a time, one in the upper third of the oven and one in the lower third. Be sure to rotate the trays once or twice for even baking. Baking two trays at a time will yield speedier results but I have always found that my cookies look best if I bake one tray at a time in the center of the oven. So when time permits I do it that way.


Sunday, August 3, 2014

Eataly


You can not help but utter "Wow" when you enter Eataly as I did recently when visiting Chicago for my annual girls' weekend. It is unlike any store I have experienced before. Devoted to high quality food and drink, much of which is Italian, it is a store after my own heart. Plus it has a clever name.


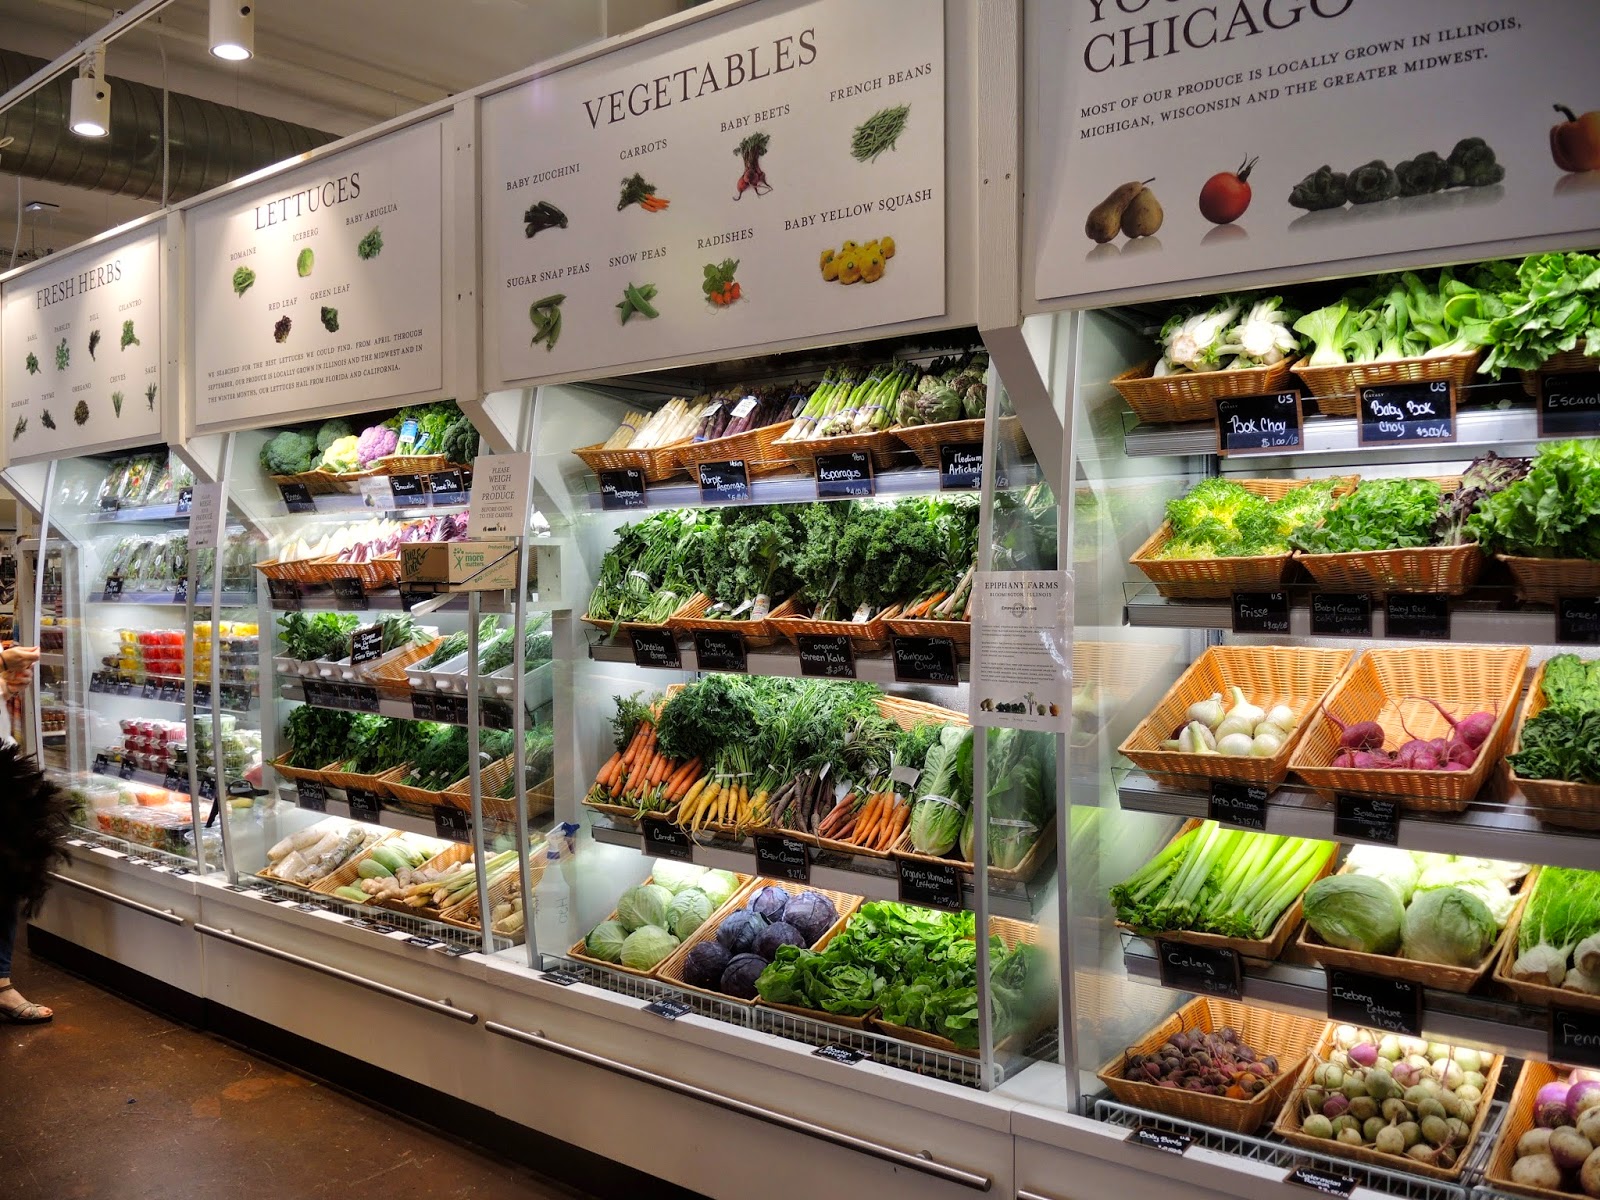
You are first greeted by a colorful and enticing array of luscious produce handsomely displayed in pretty baskets. 


Giant awesome chandeliers draw your eye up to the two story establishment. 


Clever signs grace the walls throughout, a reminder that eating seasonally is best - "Let's Be Smart! Seasonal Food Tastes Better And Is Cheaper" 


The seasonal wheel helps customers know what to purchase.


Of course no great food store would be complete without luscious pastries. In addition, the first floor has a coffee bar, panini and Nutella restaurants, gelato and ice cream, and candies.


There is also an interesting and fun assortment of kitchen accoutrement. 


But the second floor is where it really gets interesting.


Wine and craft beer start things off...


...followed by cheese and meats. They make fresh mozzarella daily.


In addition to the fresh meat and seafood counters there are seated counter and dining areas serving meat, seafood, wine, and beer. I could have spent a week eating my way through the place.


The extensive fresh pasta selection is indeed impressive. You can watch it being made.


It took a lot of restraint for me not to walk into the bakery and start kneading dough. The proofing racks full of bread dough brought back memories of my days at the bakery in California. I love the smell of flour and yeast.


Fig is my favorite artisan loaf.


There are several restaurants throughout the store. This one had two giant wood-burning pizza ovens. I love the chairs. Such clean lines - so Italian.


If you happen to live where there is an Eataly (Chicago, New York, Italy, Japan, Istanbul, or Dubai) consider yourself lucky and check the place out. You won't be disappointed.


If the food and wine don't put a smile on your face the signs will. The above sign says, "Italian Man's Dream Woman (Also Known As His Mother)". 


I could not agree more with the "Checkout" sign. Life is too short not to eat well. At Eataly there is no excuse not to. Enjoy!