Sunday, February 16, 2014

Cheesecake Brownies


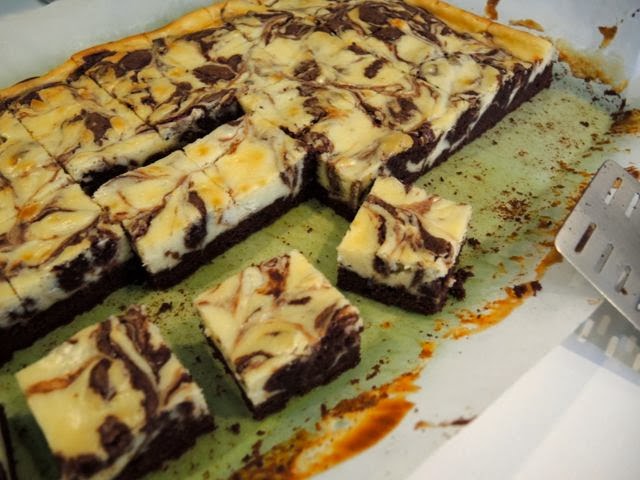
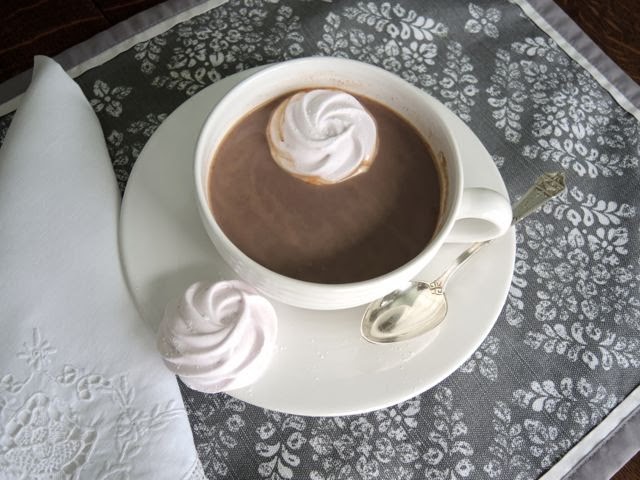
Chocolate and cheesecake are reoccurring flavor themes in our household. We adore both. So when the craving gets strong I put them together in cheesecake brownies for a rich satisfying treat. This recipe is adapted from Stars Desserts by Emily Luchetti, a well-used cookbook of mine.

Emily Luchetti was the pastry chef at the now defunct, yet legendary, Stars restaurant in San Francisco. She has written several excellent cookbooks. I always get perfect results and rave reviews when using her recipes. 

My late husband and I had the privilege of dining at Stars restaurant by famed chef Jeremiah Tower during our life in the San Francisco Bay Area. At times Chris and I day-dreamed of ditching our day jobs in the financial district and attending the California Culinary Academy to become chefs. We even talked seriously about it until our left brains took over and kept us practical and responsible. Still the conversation of us owning a restaurant with Chris at the stove and me at the oven continued for years. 

Chris was a civil engineer who I always felt secretly wished he had been an architect. He was intrigued by Jeremiah Tower who had a master's degree in architecture from Harvard University, but chucked it all to be a chef. Chris was an excellent, self-taught cook in his own right. Ironically, our son Addison, who is studying architecture in college, often jokes if all else fails he will become a chef. I guess the cooking gene runs in the family.

Jeremiah Tower was one of the pioneers in creating California cuisine. I still reminisce about a memorable meal of roast salmon on a bed of braised lentils I had at Stars. It may not sound revolutionary today, but it was the first time I had seen lentils on a menu outside of France. Fresh, seasonal fare skillfully prepared is what propelled these early chefs to the rock star status many enjoy today.

But I digress. When making brownies I like to line the pan with a large piece of parchment paper. It makes removing the brownies from the pan and cutting them much easier. If you choose not to line the pan lightly butter or oil and dust with flour.


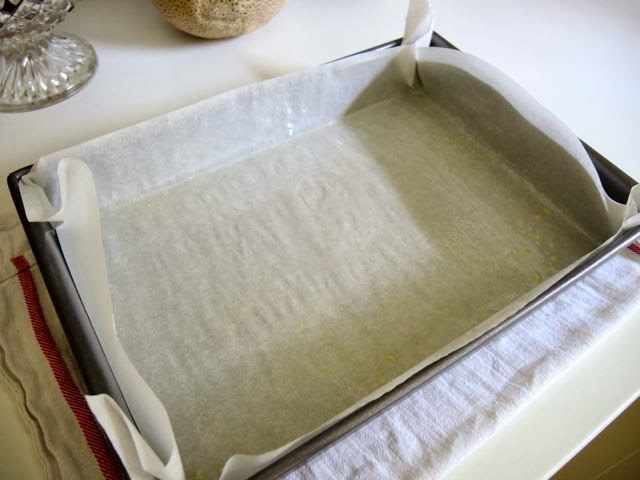
Lightly spray the parchment paper-lined pan with cooking spray.


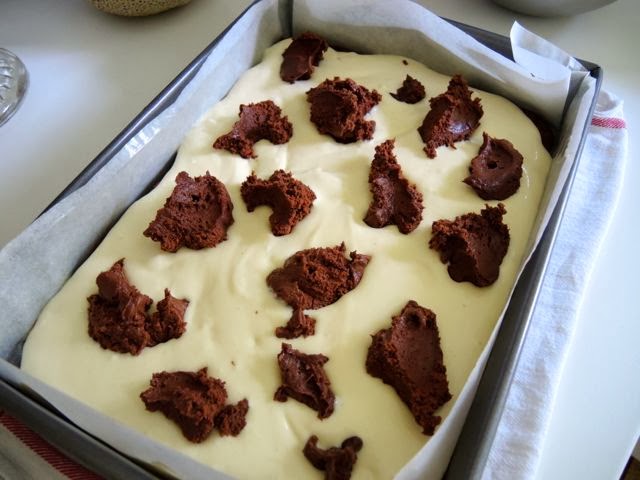
Drop spoonfuls of chocolate batter over the cream cheese batter. Use a knife to create a swirl pattern. Don't over mix, you don't want to combined the two batters.


Let the brownies cool completely in the pan before lifting them out by the parchment paper. It it nice to have a second pair of hands to help if possible.


Cheesecake Brownies
Adapted from Stars Desserts by Emily Luchetti

5 ounces (144 g) bittersweet chocolate, chopped
2 ounces (58 g) unsweetened chocolate, chopped
7 ounces (201 g) unsalted butter, at room temperature
2 cups (400 g) granulated sugar
5 large eggs, at room temperature
3/4 cup (105 g) plus 1 tablespoon (8 g) flour
a pinch of salt
20 ounces (563 g) cream cheese, at room temperature
1 teaspoon (5 ml) vanilla extract

Preheat oven to 325℉ (163℃).

Line a 9 x 13-inch (23 x 33 cm) pan with parchment paper and spray with cooking oil. Or butter and dust with flour if not using parchment paper.

Combine bittersweet and unsweetened chocolate, melt in a double boiler or in a microwave on 50% power. Stir until smooth. Set aside to cool slightly.  

In the bowl of a standing mixer with a paddle attachment combine butter and 1 1/4 cups (225 g) sugar. Beat on medium speed until light and fluffy. Add 3 eggs, one at a time, beating well in between. On low speed mix in the melted chocolate until well combined, then add the flour and salt. Spread all but one cup of the chocolate batter in the prepared pan. 

In a clean bowl, using a paddle attachment, beat the cream cheese and remaining 3/4 cup ((150 g) of sugar on medium speed until smooth. Beat in the remaining 2 eggs and vanilla extract. Pour the mixture over the chocolate batter. Drop spoonfuls of the reserved chocolate batter on the cream cheese mixture. Run a knife through the two batters in swirl patterns to create a marbleized effect. Don't over do it. You don't want to completely mix the two batters together.

Bake for 45-55 minutes until the brownies are just set in the middle. Let cool completely in the pan before lifting the brownies out by the parchment paper. Put on a cutting board. Gently peel the parchment paper off the sides and cut into squares. 


Sunday, February 9, 2014

Homemade Raspberry Marshmallows with Dark Hot Chocolate


When my sister and I were young we would lock ourselves in the bathroom and play scientist. At the time my father was a chemist. He would bring home test tubes and beakers for us to play with. We would mix mouthwash and shaving cream or whatever we could find in the bathroom closet like mad scientists until our mother would scold us from the hallway telling us to stop wasting dad's shaving cream and put the cap back on the toothpaste. I guess those early days trying to make a chemical reaction is when my love of baking began. 

While cooking is an art, baking is a science, as well as a labor of love. With cupid about to launch his arrows what better way to celebrate the chemical reaction of love than with a batch of homemade raspberry marshmallows. After all marshmallows are just a chemical reaction between gelatin and sugar syrup. 

When we were in Paris this summer we bought pastel-colored marshmallows or guimauve, as the French call them, at Hediard. I was intrigued how this lowly confection was elevated to an art form. I had never made homemade marshmallows before. It was time to give it a try.

I found it isn't hard. It is just a little messy. If you approach it with childhood curiosity it is a whole lot of fun. Do make sure to have everything ready before you begin as the marshmallow mixture sets up quickly. You can pipe the mixture or spread it on a pan and when set, cut into pieces with a knife or cookie cutter to create shapes like hearts or snow flakes.

With Valentine's Day near and our brutal winter hanging on I combined deep, dark hot chocolate with fluffy raspberry marshmallows to share love and warmth and brighten our lives. Making the marshmallows made me feel like that mad scientist of my youth.


I let the raspberry purée gently color the marshmallows. The color is very pale, which I prefer. If you want a stronger pink add red food coloring a drop at a time when beating the marshmallow mixture until you reach the desired color.


A sturdy candy thermometer makes this recipe easy and guarantees perfect results.

Once the mixture is light and fluffy work quickly as it starts to set up fast. I piped a tray of double rosettes. (Apologies to my pastry teachers Kelly and Peter for the rosette imperfections as I was working very quickly.) I then spread the remaining mixture on another prepared tray to cut out heart shape marshmallows.


Make sure to use plenty of powdered sugar (my preference) or corn starch to keep the mixture from sticking as the cut edges stick to everything.

Once the mixture is firm flip upside down on another piece of foil that is generously dusted with powdered sugar or corn starch. Gently remove the foil from the flipped side before cutting into shapes. Dredge marshmallow pieces in powdered sugar or corn starch before storing in an airtight container. Marshmallows will keep up to two weeks or longer if you omit the egg whites.


The scraps are good for nibbling.

You can leave out the egg whites if you prefer, the recipe will work just fine without them, However, they greatly enhance the flavor.

Raspberry Marshmallows
Inspired by a recipe from Sugarbaby by Gesine Bullock-Prado

3 tablespoons, plus 1 teaspoon (22.5 g) unflavored gelatin
1/4 cup (60 ml) water
1/4 cup (60 ml) raspberry purée
2 cups (400 g) granulated sugar
1/2 cup (120 ml) corn syrup
1/2 cup (120 ml) hot water
2 egg whites, optional
1/2 teaspoon (3 g) salt
1 cup (130 g) powdered sugar or corn starch, plus more for dusting

Prepare a pastry bag with a large star tip and set aside if piping the marshmallow mixture. Cover two sheet pans with aluminum foil. Sprinkle each generously with 1/2 cup (65 g) powdered sugar or corn starch making sure to get good coverage. If spreading the marshmallow mixture have a large offset spatula handy. Lightly oil with vegetable oil or non-stick spray.

Combine the 1/4 cup (60 ml) water and 1/4 cup (60 ml) raspberry purée. Set aside. Put gelatin in the mixing bowl of a standing mixer fitted with a whisk attachment. Pour the water and raspberry purée mixture over the gelatin and let sit to adsorb the liquid. (Before adding the hot sugar syrup make sure the liquid is adsorbed and all the gelatin is wet. Stir if needed.)

Combine sugar, corn syrup, and hot water in a heavy saucepan. Melt over medium-low heat until all the sugar is dissolved. Increase the temperature to medium-high. Boil gently until temperature reached 250℉ (121℃) on a candy thermometer. (If a lot of sugar crystals start to form around the edges of the pan use a damp pastry brush to dissolve them.)

If using egg whites - while the sugar syrup is cooking, beat egg whites and salt in a separate bowl with a hand-held mixer until they form stiff peaks. Set aside.

When the sugar syrup is ready turn the mixer on medium-low speed and very slowly and carefully pour the sugar syrup down the side of the bowl to avoid burning the gelatin and splattering the hot syrup. Once all syrup is incorporated raise the mixer speed to high and beat until mixture doubles in volume and becomes light, fluffy and very thick. Add the egg whites, if using, mix to incorporate.

Fill a pastry bag and pipe desired shapes, such as rosettes or 'kisses', on prepared pans. Or spread on prepared pans and smooth with a lightly oiled offset spatula. Work quickly as the mixture will begin to stiffen very fast. Let sit to dry for at least 4 hours or over night.

If you piped the marshmallows, once set peel off of the foil and dust with additional powdered sugar or corn starch. If you spread on a cookie sheet cut in squares with a knife or cut into shapes with cookie cutters. Spray the knife or cookie cutters with non-stick spray to keep from sticking. Dredge the cut pieces in powdered sugar or corn starch to keep them from sticking together. Store in an airtight container, such as a tin, for up to two weeks. They will keep longer if you do not use the egg whites.


I prefer my hot chocolate to be more chocolate than sweet, plus the marshmallows add a good dose of sweetness, but feel free to increase the sugar to taste if desired. You can double the hot chocolate recipe to make 4 servings or drop in half to make a single serving.


Dark Hot Chocolate

2 cups (470 ml) milk
2 tablespoons (7 g) cocoa powder
4 teaspoons (16 g) granulated sugar
1/2 teaspoon (2.5 ml) vanilla

Stir cocoa powder and sugar together in a small glass bowl. Scald milk. Add a few spoonfuls of scalded milk to the cocoa mixture stirring to make a paste. Add more milk until the mixture is thinner and there are no lumps. Then stir the cocoa mixture into the rest of the hot milk. Use an emulsion blender if desired to further blend the mixture. Serve with raspberry marshmallows. Makes 2 servings.


Wednesday, February 5, 2014

P.O.S.H.


Every summer during our girl's weekend I look forward to visiting P.O.S.H. A charming little shop located in the historic Tree Studio Building full of interesting and many one-of-a-kind items to grace the table and the home. I usually manage to snag a unique cake stand as well as a few gifts. 


I was told the owner was a flight attendant for many years flying back and forth between the United States and Europe. During down time he frequented flea markets and sales. Thus the shop was born.


Chicago is a bustling city, but when you step inside P.O.S.H. you can't help but feel you have entered a more graceful era. Warm and welcoming, the shop has something intriguing to see at every turn. I love the plate display rising up the wall, especially the cup and saucer. So clever.


With a secluded courtyard behind the store there is always the added bonus that a wedding may be about to take place. It was a hot summer. The happy couple provided personalized fans for their guest's comfort. What a nice touch.


If you find yourself in Chicago, do pop in P.O.S.H. for a visit. You will be glad you did.